iOS Push Notification
Introduction
We need an APNs Certificate for pushing on iOS
- Login Apple Developer Account
- Click Certificates, Identifiers & Profiles
- If you do not have the App ID, press '+' to create
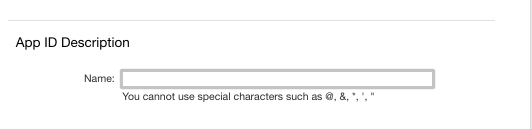
Enter App ID Description :
Enter Bundle ID :
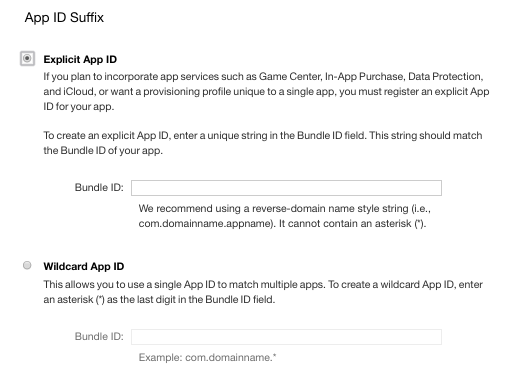
Should be the same as the name we created when creating a project
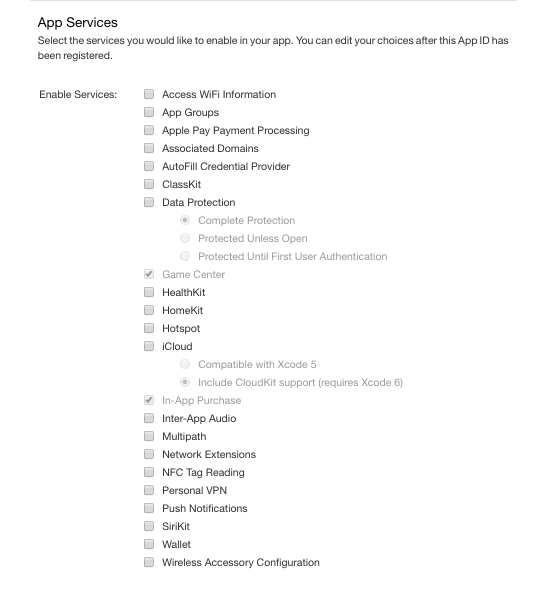
Choose Push notifications :
-
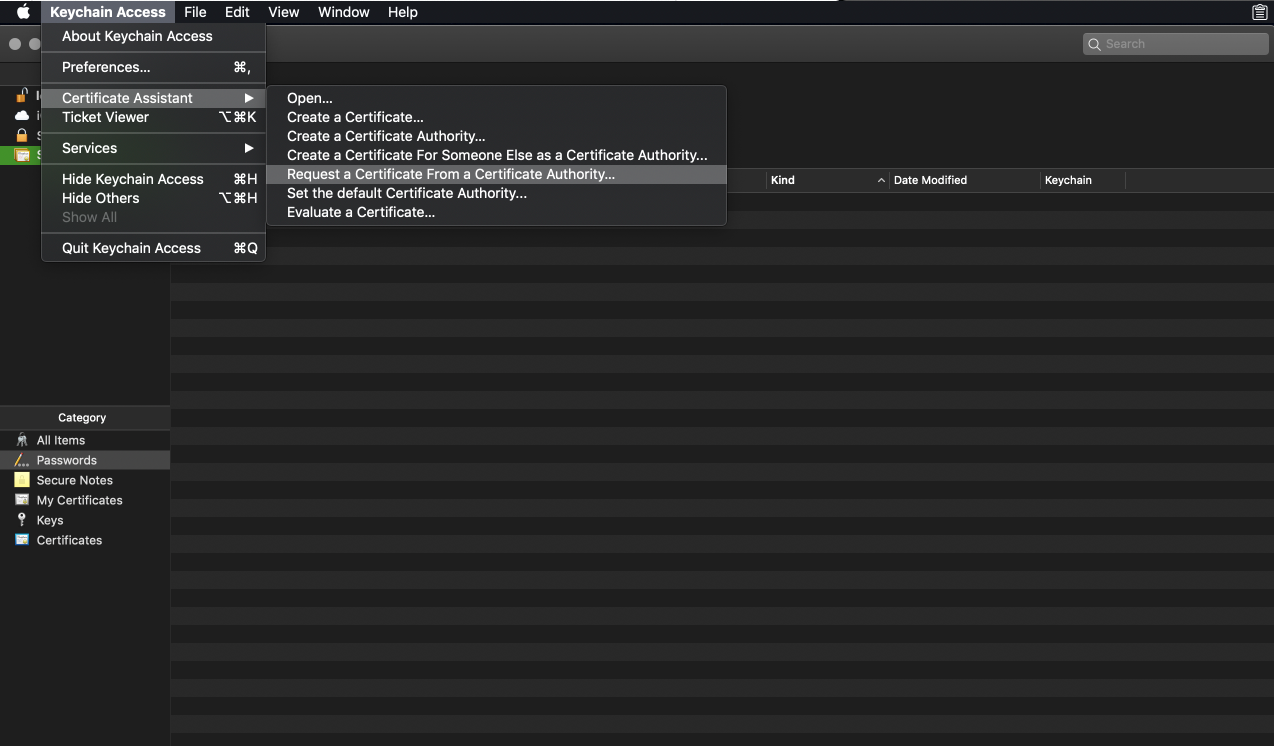
Open Keychain Access.app
-
Click Request a Certificate from a Certificate Authority. :
-
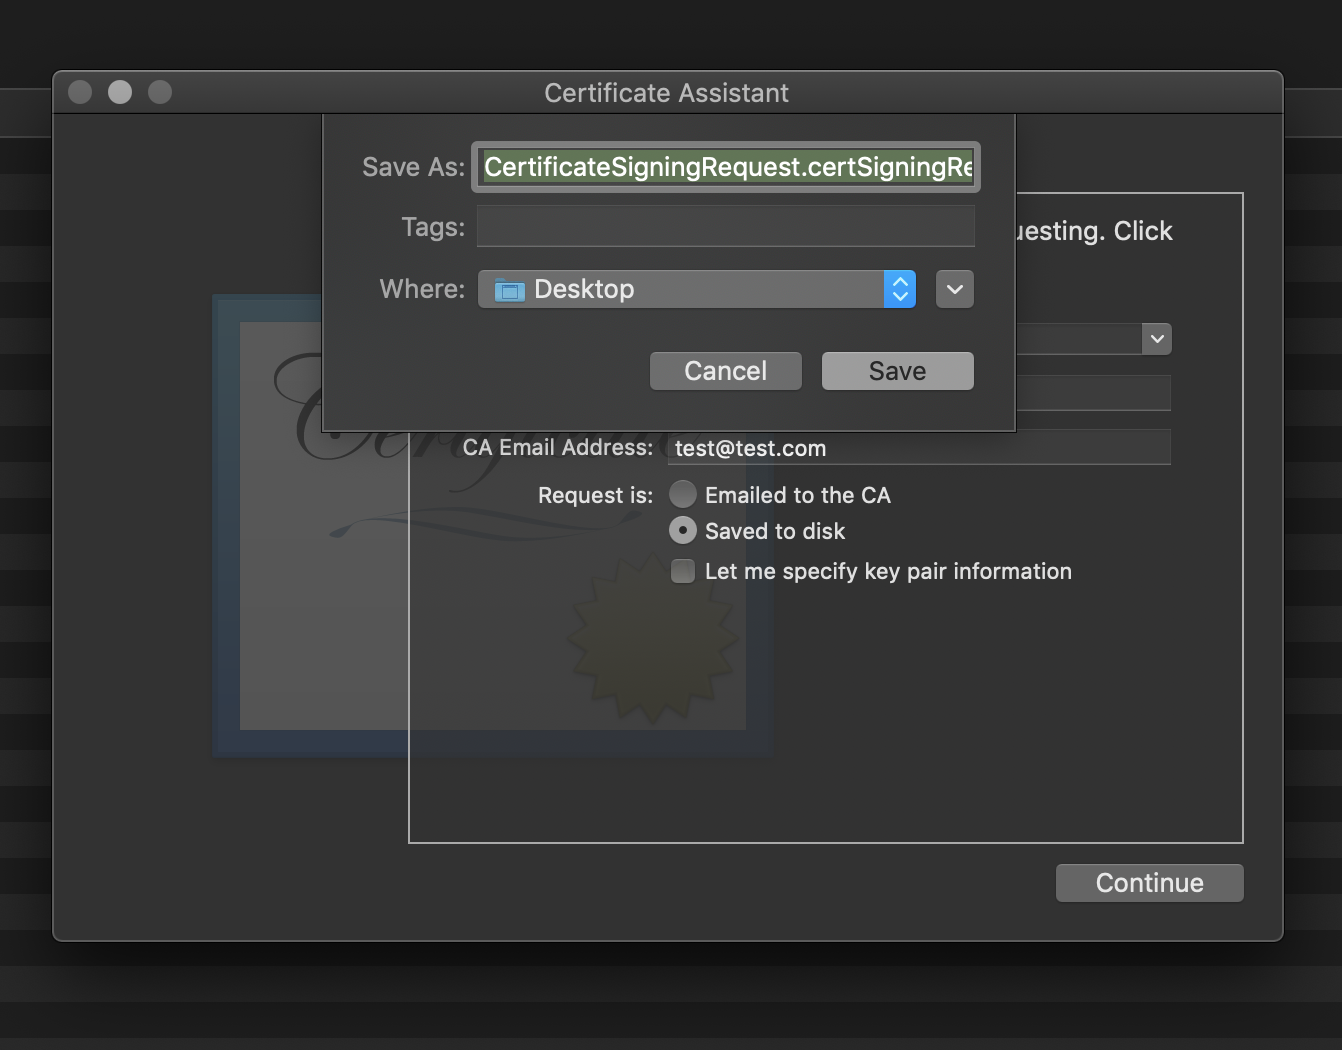
Create .certSigningRequest file :
We choose the app we created in app ID's in apple developer accounts and click Edit. Choose Development or Production SSL Certificate then click Create Certificate:
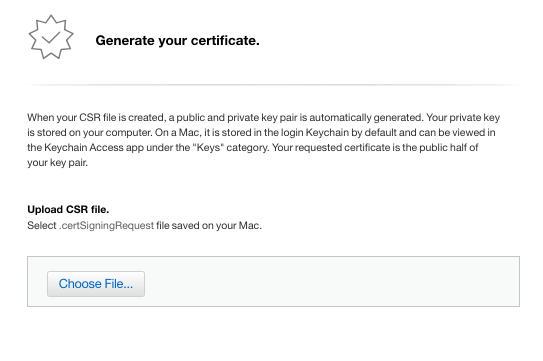
- We need to upload the generated file
-
Download .cer file
-
Double-click the .cer file and find it it installed in your Keychain Access:

-
Select the certificate and press export :
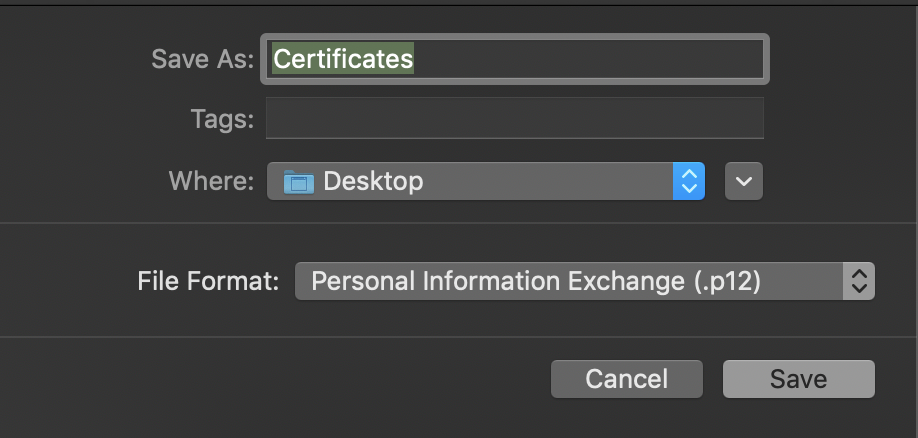
Note the password you created
There are two ways to send :
- Firebase
- APNs
Firebase
- Create a project as follows :

- Select iOS icon :
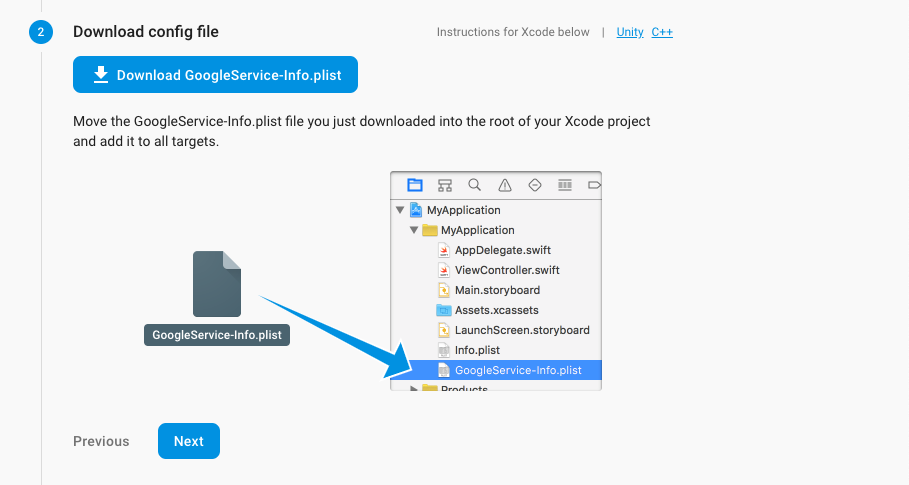
- Once you've entered your package name, put the GoogleService-Info.plist file in the root directory as shown in the image download step :
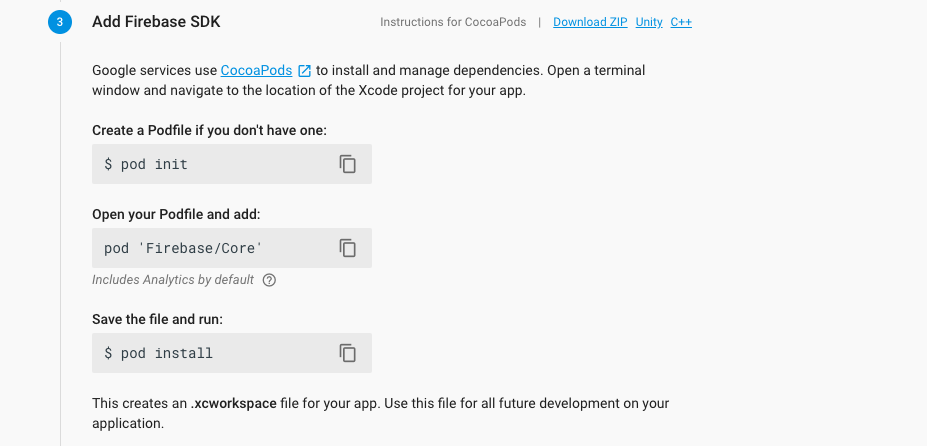
- Add the following codes to your podfile :
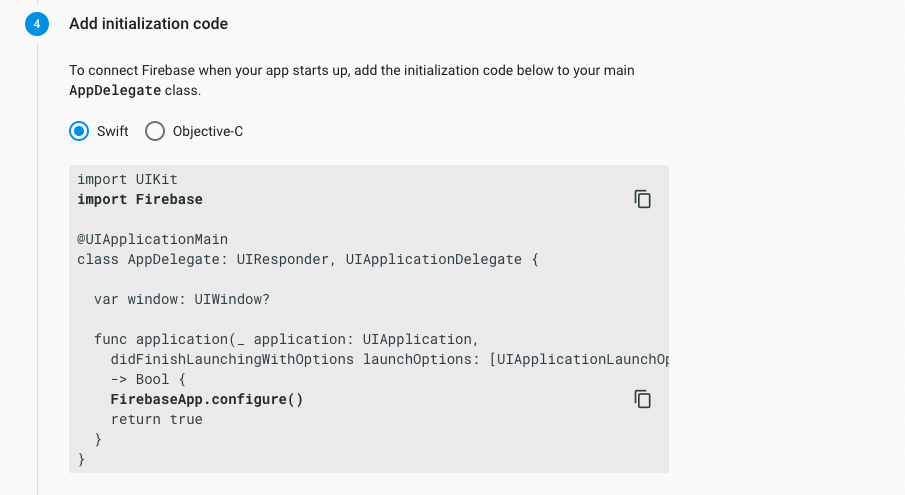
- Add to your AppDelegate class file:
- If you complete these steps you will see a step to verify the following. (You can skip this step) :

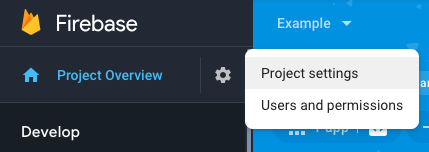
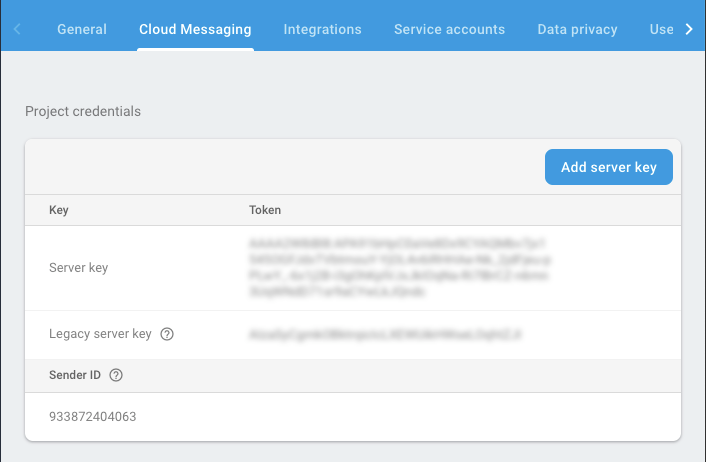
- Go back to the main page and click on the project settings :
- Select cloud messaging and get server key :
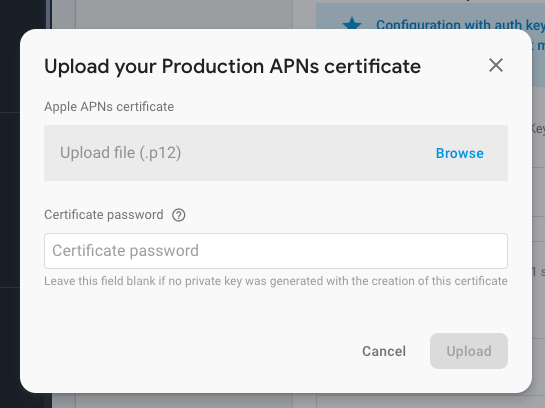
- In iOS app configuration, we click on upload in APNs Certificates (We need to upload the .p12 file) :
-
After opening the project in Xcode, click on the project on the left side.
-
Select Capabilties and Activate push notification

If your information is correct, this will be green
- After entering https://panelv2.segmentify.com, enter the settings as below :
- After selecting Push, click the iOS tab(Firebase) and enter your server key :
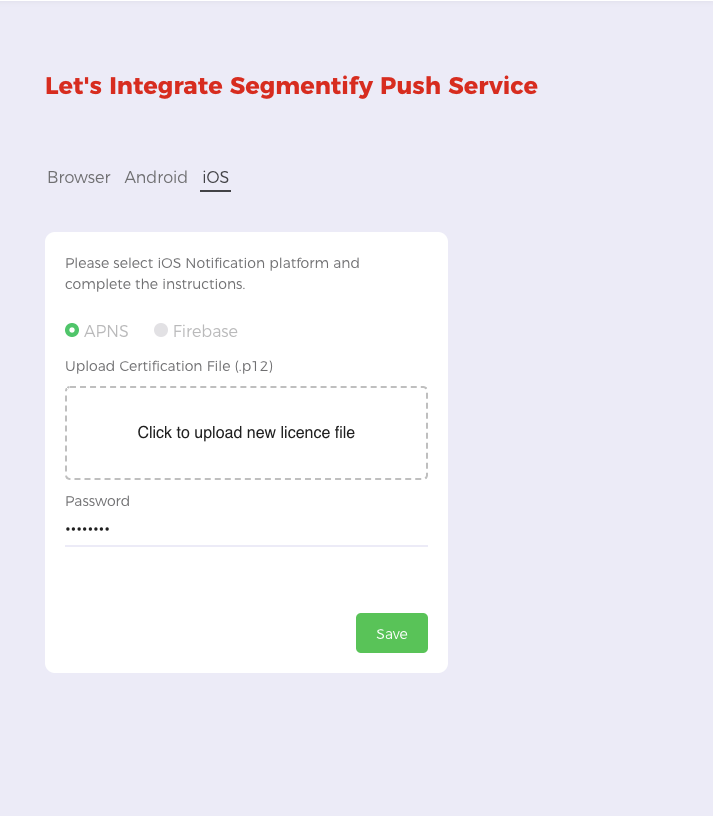
Select APNs if you want to send via apns and upload your .p12 file
Permission Info
Used to send deviceToken of users who give push permission.
InstanceID.instanceID().instanceID { (result, error) in
    if let error = error {
        print("Error fetching remote instange ID: \(error)")
    } else if let result = result {

        let obj = NotificationModel()
        obj.deviceToken = result.token
        obj.type = NotificationType.PERMISSION_INFO
        obj.providerType = ProviderType.FIREBASE
        SegmentifyManager.sharedManager().sendNotification(segmentifyObject: obj)
    }
}
Click
It will be sent when the user clicks notification.
We need to send data to the page after clicking :
let instanceId = userInfo["gcm.notification.instanceId"]
let productId =  userInfo["gcm.notification.productId"]

let obj = NotificationModel()
obj.instanceId = instanceId as! String
obj.productId = productId as! String
obj.providerType = ProviderType.FIREBASE
obj.type = NotificationType.CLICK
SegmentifyManager.sharedManager().sendNotificationInteraction(segmentifyObject: obj)
instanceId and productId will be in the notification data
Information for Analytic Platform
This information is available if push information is sent to analytic platform
The UTMmodel class is as follows :
public class UtmModel{

    public var utm_source:String?
    public var utm_medium:String?
    public var utm_campaign:String?
    public var utm_content:String?
}
See our sample application : Example
Example AppDelegate : Example AppDelegate
Example Notification Service : Example Notification Service