Placing wigets in sectioned themes
Placing the recommendation wigets are super easy if you using a "sectioned" theme. but don't worry if your theme is not support sections, this document also contains step-by-step guide to placing widgets to a non-sectioned theme.
If you are not sure whether you use a sectioned theme or not, you can simply check if your theme has a directory named sections.
Quick info
Sections are Liquid templates that have access to the same global objects, tags, and filters as other templates. Sections for Shopify Themes announced at October 2016. For further information about sections see the shopify docs.
Segmentify installs the needed Liquid file during the app installation. All steps in this section uses the Shopify Theme Editor.
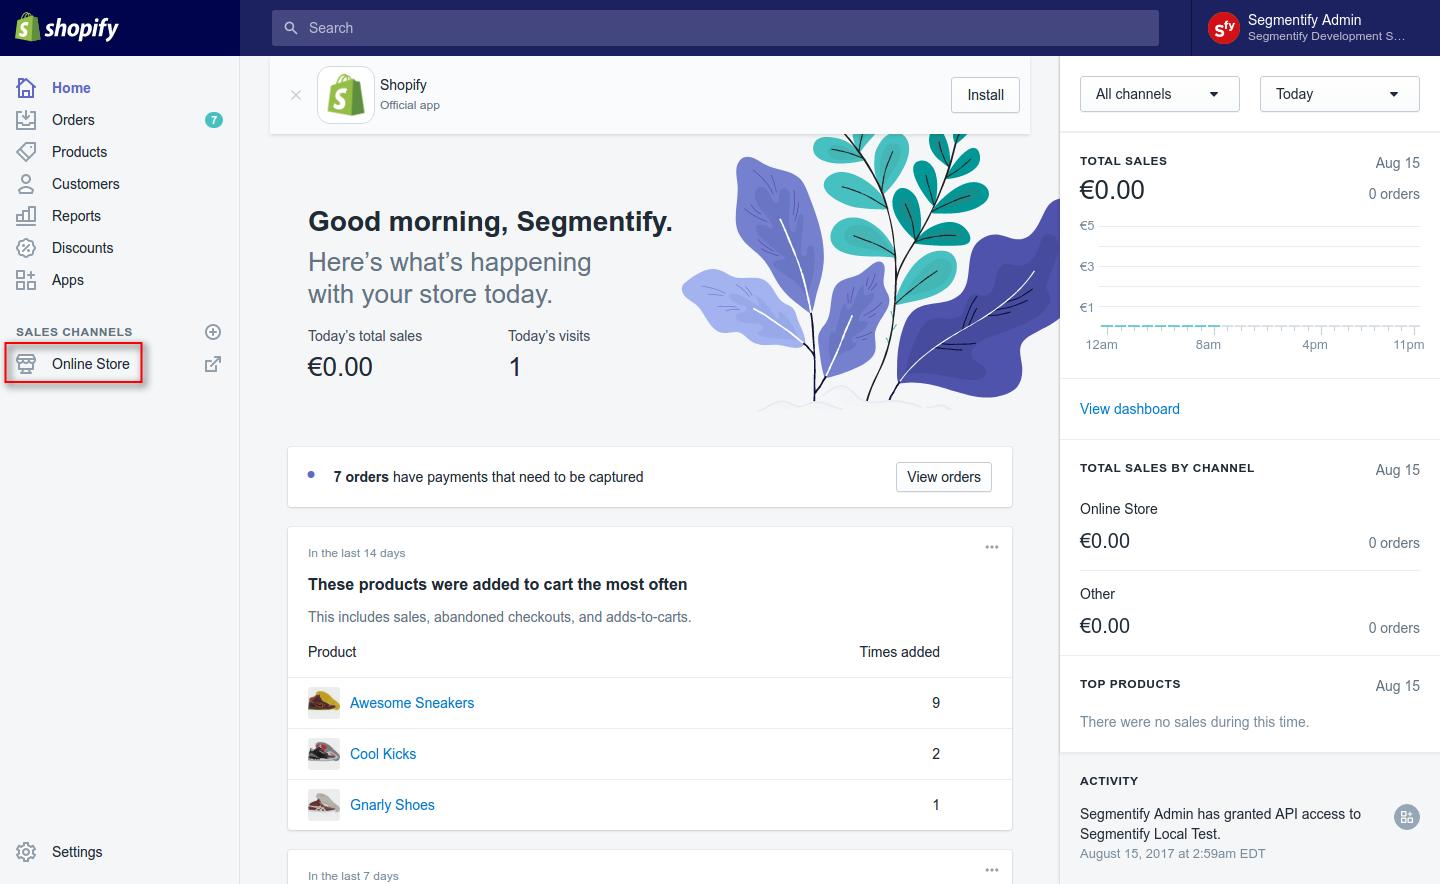
Step 1: Open the theme editor
Just click the "Online Store" link on the left, default page is "Themes"
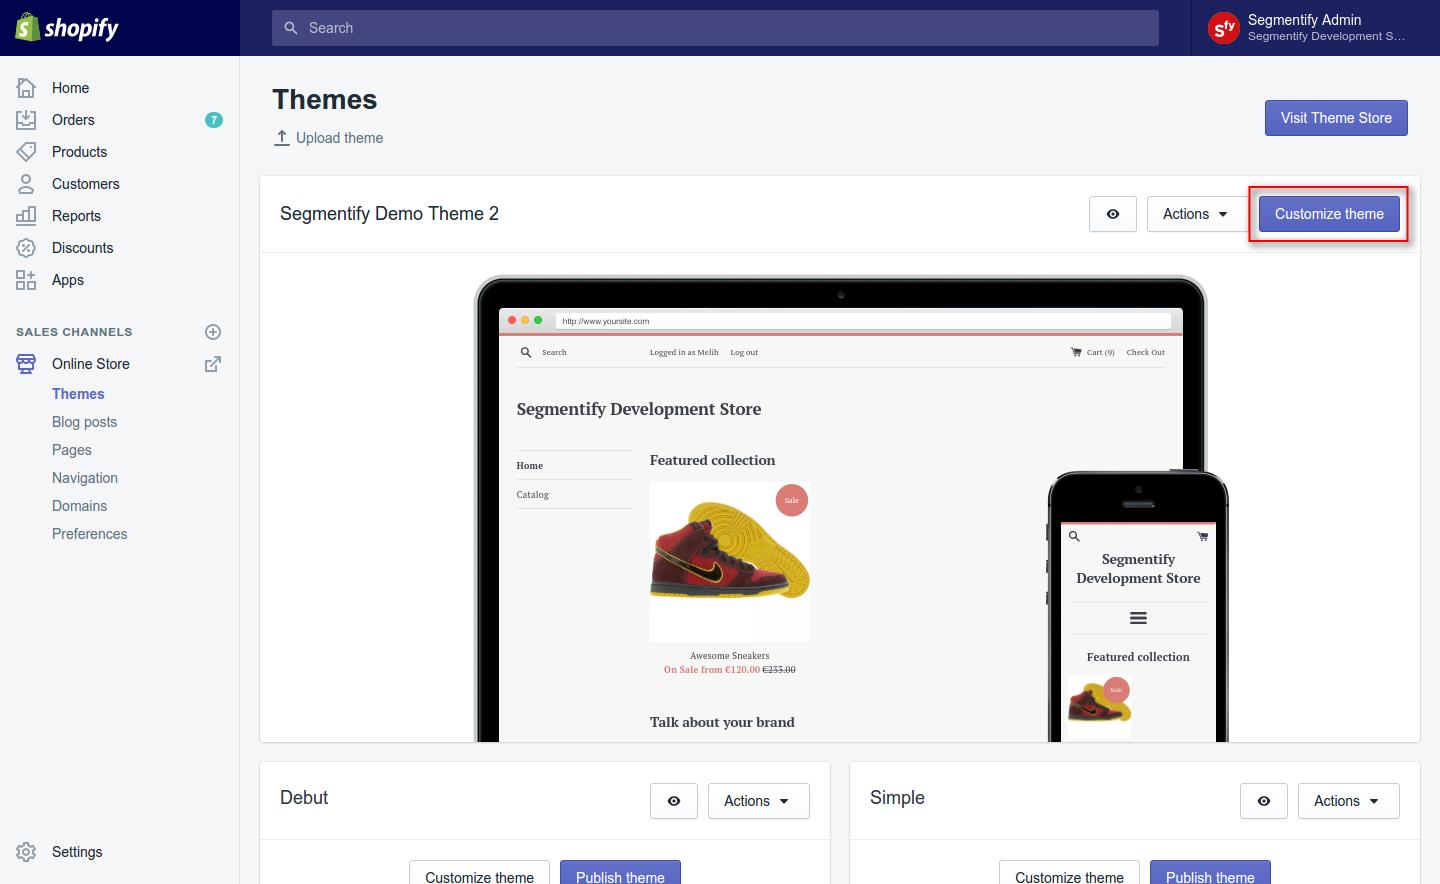
Step 2: Customize the theme
Click the "Customize theme" button to open theme edit screen.
Step 3: Theme edit screen
On this page, you can live-edit your template. On the left side, you can find "section" options and on the right side real-time preview of your theme.
Click the "Add section" button. This will reveal the available sections.

Step 4: Add a section
At the section list on the left, find the "Segmentify" and click on it. This add the Segmentify widget to your theme temporarily so you can see the location of the widget.

Step 5: Preview the widget

Step 6: Configure the widget

Step 7: See the widget in action

Please notice that, there is a black bar on the bottom of the page. This is the Segmenitfy test widget. While your campaigns in "test mode" they are not visible on your page thus while you editing your theme Segmentify turns test mode on auto-magically.

When you happy with the widgets position and style, go to segmentify panel and get your campaign live to make it visible to your customers.
Step 8: Re-order the widget (index page only)
